Warning: Technology changes very quickly so it is always recommended that you look at the date when the article was last updated. If you have any questions feel free to contact us.
Article Date: 06-19-2015
Disclaimer: While we strive to give you the most accurate and helpful computer advice possible:
SilentPC.com (Cool Tech PC Inc.) cannot be held responsible for any damage to your PC by attempting to follow the PC operating recommendations detailed on this page. If you have purchased a PC from us and you run into these types of errors detailed in this article, please feel free to contact us at support@silentpc.com.
When you purchase a PC from SilentPC.com, you can rest assured that we not only choose the most reliable components, but we thoroughly test every part in our PCs. When our customers add products or change BIOS settings independently of us, errors can occur. SilentPC.com cannot be held responsible for parts added to systems by customers, or custom BIOS work done by customers or technicians other than ourselves.
However, if you run into BIOS problems, the following are the most common reasons for BIOS errors and computer instability that we have run into, and how to update your BIOS in order to fix the following problems.
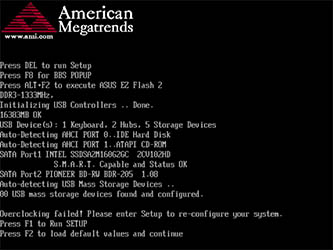
The Failed to Overclock error screen shows up whenever your BIOS settings have been cleared, and usually has nothing to do with actually overclocking your system, unless you just tried to overclock your system. Some common occurrences which cause this error to arise are:
We do not recommend overclocking any part in your Quiet PC. Overclocking the RAM or CPU is not something we support, because you are basically telling your PC to send more power to the CPU or RAM than the component was designed for in order to increase speed and performance. Overclocking diminishes the life expectancy of your PC, and can damage PC components (when done incorrectly). When using a silent PC, generally speaking, you are already dealing with higher temperatures than you would with a standard build. Overclocking exponentially increases those heat levels in your PC, putting more wear and tear on your components.
Failed Device is the second most common instance of a bios error screen (besides overclocking your PC). This happens when a new flash drive, USB device, or hard drive is connected to your PC. Most of the time adding a new flash drive or hard drive to your PC should not be an issue, since all of the ports in our PCs are tested thoroughly. Yet, we cannot test every component or piece of equipment customers choose to add to their machine, later on down the road.
Failed USB drives and USB devices, or bad hard drives commonly cause this type of error screen. If you encounter this BIOS error immediately after connecting a new device to your PC, simply disconnect the device and reboot to see if the error continues. If everything works well after the new device is removed, then you can assume that the new device was defective or unstable.
If you've added a new piece of equipment, first disconnect and reboot it, to see if the error continues to reoccur. If the error is not present when the new device is removed, then there could be an incompatibility issue between the new device and your system, or the new device may be defective. Connecting the device to another computer will help you know if the device is defective or not.
If you have purchased a PC from us and you run into this type of bios error screen without adding a new device to your PC, please feel free to contact us at support@silentpc.com since there could potentially be a bigger problem behind the BIOS error screen.
If your BIOS settings have been reset, or if you're attempted to overclock your PC and your PC failed, you may need to set the BIOS back to its optimized default settings. Setting your BIOS back to orginal settings is also referred to as restoring your BIOS settings. SilentPC.com (Cool Tech PC) saves all of our BIOS settings under the BIOS profiles tab, which most modern motherboards support. Simply load any of the pre-saved profiles under the profiles tab (unless you have altered one of those profiles) to reset everything back to the way it was when we sent the PC out.
Below is a quick guide on how to load your bios profiles:
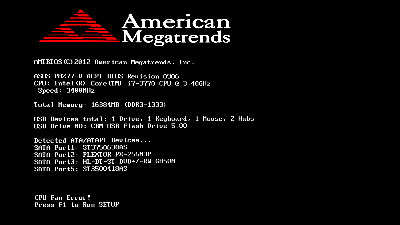
Many customers run into an error that tells them that the CPU fan has an error. This is usually just because our silent fans spin slower than normal fans. We've designed our machines to be as quiet as possible, and some of our designs have no moving parts in them at all.
This error most often occurs when the settings in the BIOS have been reset, often due to an improper shut down or a power outage. By default we disable the CPU fan speed sensors because the motherboard will think that the fans are dying (even though we are just using slower fans than a standard build). We recommend checking in the BIOS under the Hardware Monitor section to verify that the CPU fan is actually spinning if you receive this error. Yet, we still recommend turning the fan sensor off in the BIOS because all of our quiet CPU coolers.
Because there are so many different types of BIOS versions, we cannot provide step-by-step instructions on how to do this. Almost all of the fan settings in the BIOS are going to be located in the hardware/monitor section of the BIOS. Please consult your motherboard manual for detailed instructions on how to navigate your BIOS. If you have purchased your PC from us, and are not sure how to proceed when you receive this error, please contact us at support@silentpc.com, so we can further assist you.
Seeing this CPU Fan Error should prompt you to push the F1 key which in turn will load the BIOS screen. You should make sure that all of the fans sensors are turned off in the hardware monitor section by manually turning the fan speed sensors off. The easiest way to reset everything is to load from one of the profiles which we've preset in the BIOS. This should set everything back to where we originally had it. Please note: this feature is only available on motherboards that support UEFI, and that you should still consult a technician if the problem persists or if you need help.
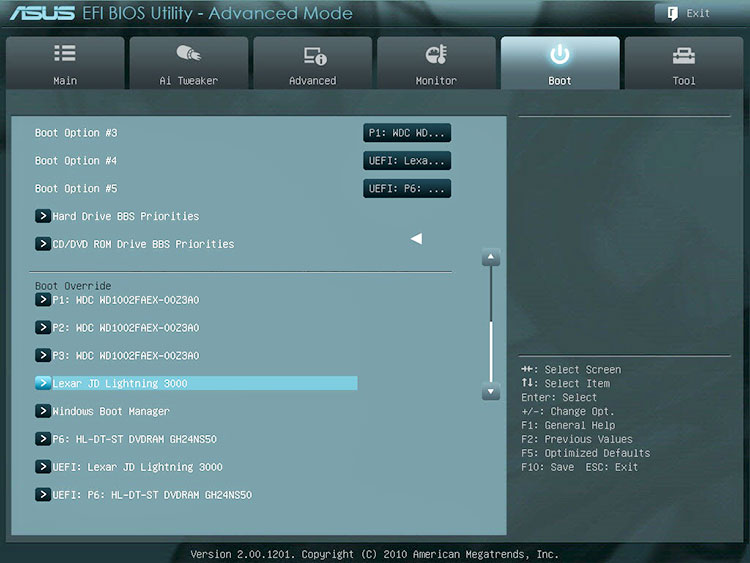
A Boot Device Error is a common occurrence among modern motherboards (which support UEFI). The DVD drive or hard drive may be set to boot as a UEFI (Unified Extensible Firmware Interface) and may not always work. UEFI utilizes the GPT partition scheme (globally unique identifiers partition table), and is far superior to that of the older MBR (master boot record). UEFI is almost always the default on modern motherboards, but this setting has been known to change when new devices are connected to the PC. Bottom line: booting off a DVD or hard drive may not always work when set to UEFI, and it is suggested to make sure that the primary boot device is either the DVD or hard drive, and not the UEFI DVD variant if you are having issues.
There are quite a few more options in the boot menu of a modern motherboard, than that of an old generation motherboard. Scrolling down on the boot page will list the primary DVD and hard drive boot options. Scrolling down even further will list the DVD boot options and the hard drive boot options. Simply select the DVD boot option, if you're trying to boot off of the DVD drive, and make sure that UEFI is not at the top of the list. The same setting should be applied to the hard drive boot options. Once these setting are saved, you should be able to boot off of the DVD drive or hard drive, with no issues. You can almost always use the Quick Boot option (Typically the F8 key) which will allow you to quickly choose which device you would like to boot off of.
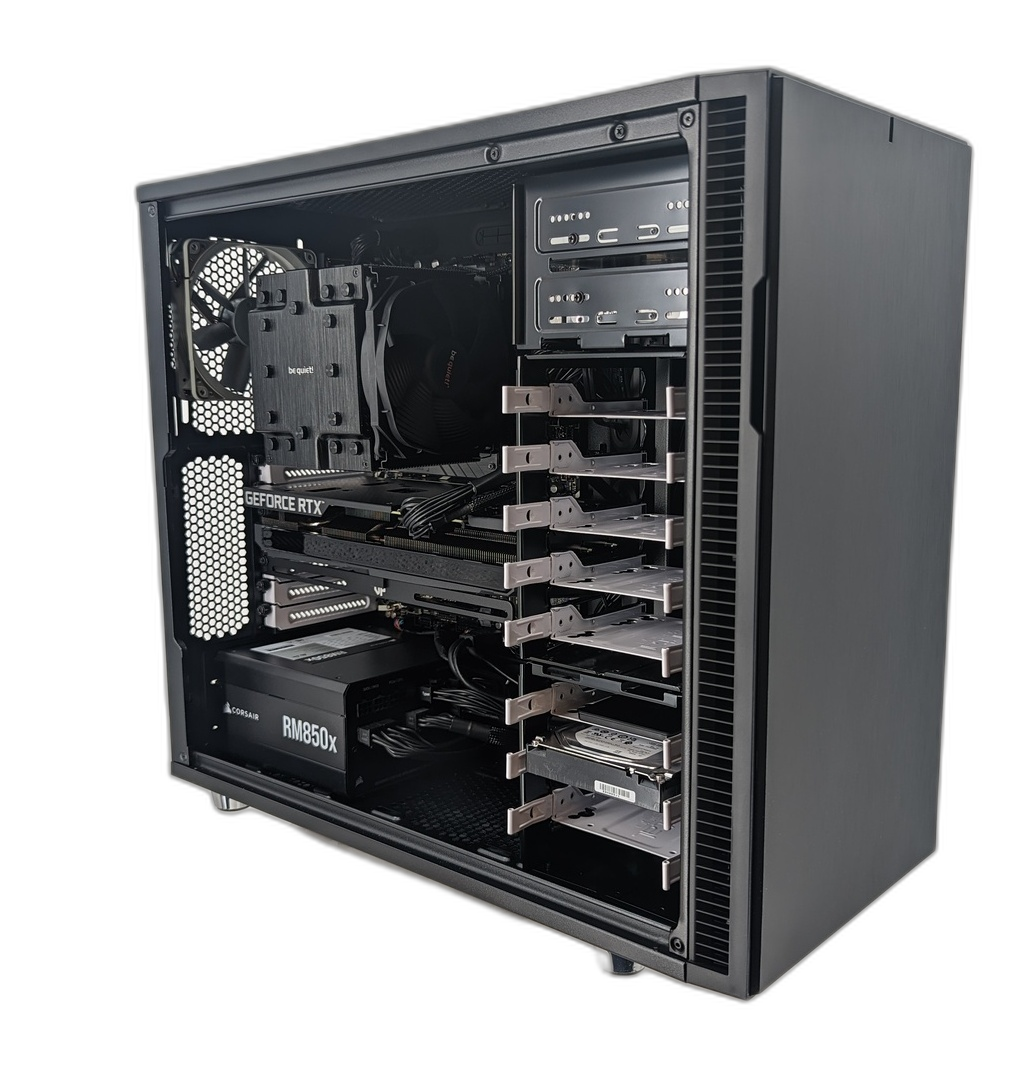
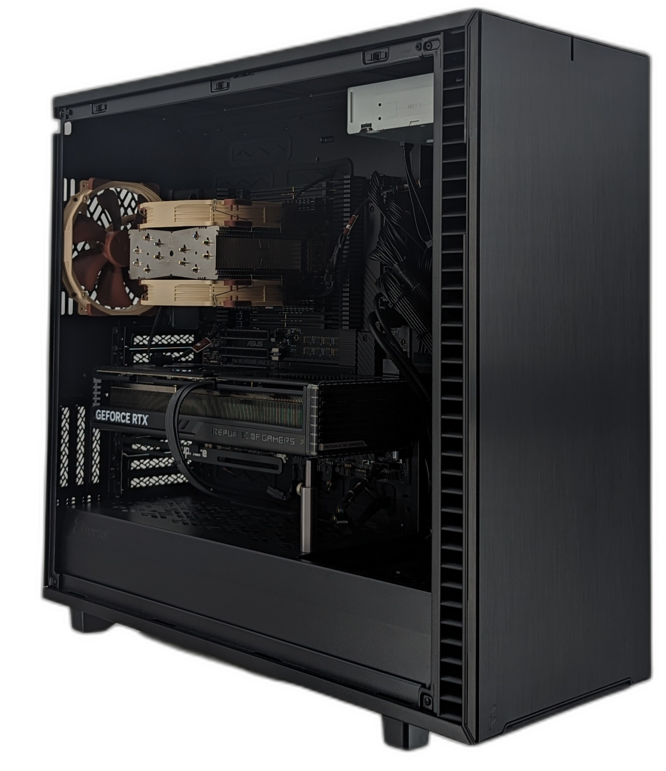
Some of our systems related to this article